
Tutorial: Working with Custom Packages in Unity
Last Update: 2020/07/24 (Unity 2020.1: packages grouped by author, documentation URL)
Overview
Sharing common functionality and library between projects is always a problem when it comes to Unity projects. Some may try to use git submodule combined with symbolic links, but somehow it seems not a decent solution. Now Unity provides the package manager like npm or those in other fields. I believe it’s a better way to solve the problem.
This tutorial will guide you creating, developing and sharing custom packages in Unity.
Creating Packages
The following is the layout convention followed by official Unity packages. Note that packages aren’t Unity projects on their own. They have to be imported to a project during development, which will be mentioned later in the tutorial.
<root>
  ├── package.json
  ├── README.md
  ├── CHANGELOG.md
  ├── LICENSE.md
  ├── Editor
  │   ├── [YourCompanyName].[YourPackageName].Editor.asmdef
  │   └── EditorExample.cs
  ├── Runtime
  │   ├── [YourCompanyName].[YourPackageName].asmdef
  │   └── RuntimeExample.cs
  ├── Tests
  │   ├── Editor
  │   │   ├── [YourCompanyName].[YourPackageName].Editor.Tests.asmdef
  │   │   └── EditorExampleTest.cs
  │   └── Runtime
  │        ├── [YourCompanyName].[YourPackageName].Tests.asmdef
  │        └── RuntimeExampleTest.cs
  └── Documentation~
       └── [YourPackageName].md
For example, if the company name is “CoolCompany”, package name is “GreatPackage”, so the runtime assembly definition (*.asmdef) will be named CoolCompany.GreatPackage.asmdef.
There are some files we need to create for the custom package later, including package.json and *.asmdef.
package.json
package.json is the package manifest file similar to npm’s. This manifest should always be placed at the root of your package. Unity package manager reads package.json to find out what the package is, such as name, version and dependencies.
Here is a sample package.json with recommended fields, please adapt this to your package:
{
  "name": "com.unity.example",
  "version": "1.2.3",
  "displayName": "Package Example",
  "description": "This is an example package",
  "unity": "2019.1",
  "unityRelease": "0b5",
  "dependencies": {
    "com.unity.some-package": "1.0.0",
    "com.unity.other-package": "2.0.0"
  },
  "keywords": [
    "keyword1",
    "keyword2",
    "keyword3"
  ],
  "author": {
    "name": "My Company",
    "email": "hello@example.com",
    "url": "https://www.mycompany.com"
  }
}
The format of the package name is com.companyname.packagename.
The value in version field must follow semantic versioning with format major.minor.patch; otherwise, it will break the strategy that automation tools use to check the compatibility. major is for breaking changes, minor is for backward-compatible API changes, and patch is about fixes with no API changes. When major is 0, it indicates this package isn’t stable for production, may includes many breaking changes frequently. The initial version of packages should be 0.1.0.
As packages for Unity, use label preview in version will let package manager know it’s in preview, e.g. 1.2.3-preview.1, 1.2.3-preview.2.
Specify the dependencies of the package in the dependencies field. These referenced packages will be imported automatically when developers import this package. Please check out npm documentation for detailed syntax about specifying version ranges, but not all the syntax are tested on Unity.
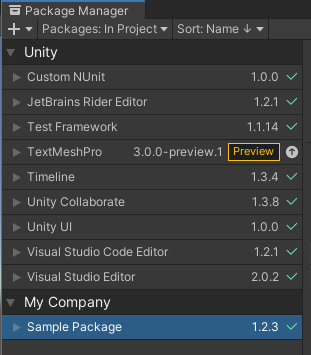
In Unity 2020.1 and later, package manager groups packages by author name:
Check out the official documentation of package.json for more details.
Assembly Definitions
Starting from Unity 2017.3, Assembly definitions provide a way to separate your scripts into different assemblies. Each of them acts as a library within the Unity project and has its own dependencies on other assemblies. Unity reduces compilation time by only rebuilding the affected assemblies instead of whole project when you make a change. Unity’s package manager fully relies on these assembly definitions. Here is an in-depth guide for assembly definitions in Unity.
Arranging all scripts into assembly definitions is required for packages. Assembly definitions will include all scripts in that folder and its subfolders, except for the subfolders with their own assembly definitions.
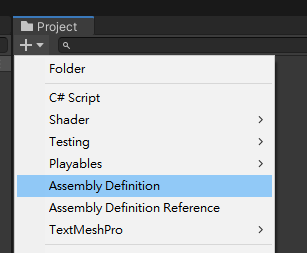
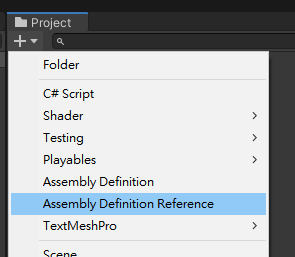
Since assembly definitions are plain text files, you can either create them with your favorite text editor or with Unity editor through the Create dropdown menu.
CompanyName.PackageName.asmdef
{
    "name": "CompanyName.PackageName"
}
CompanyName.PackageName.Editor.asmdef
{
    "name": "CompanyName.PackageName.Editor",
    "references": [
        "CompanyName.PackageName"
    ],
    "includePlatforms": [
        "Editor"
    ],
}
CompanyName.PackageName.Tests.asmdef
{
    "name": "CompanyName.PackageName.Tests",
    "references": [
        "CompanyName.PackageName"
    ],
    "includePlatforms": [],
    "excludePlatforms": []
}
CompanyName.PackageName.Editor.Tests.asmdef
{
    "name": "CompanyName.PackageName.Tests.Editor",
    "references": [
        "CompanyName.PackageName",
        "CompanyName.PackageName.Editor"
    ],
    "includePlatforms": [
        "Editor"
    ],
    "excludePlatforms": []
}
Editor scripts must be separated into another assembly definitions with only Editor in includePlatforms field; otherwise, editor scripts will be included during packaging, which results in missing reference errors.
Note that only in Unity 2018.4 and newer, the referenced assemblies can be optional, which means if there is any measure in the script to deal with missing references, e.g. define symbols, it’s ok to have some of the assemblies in the references field not found.
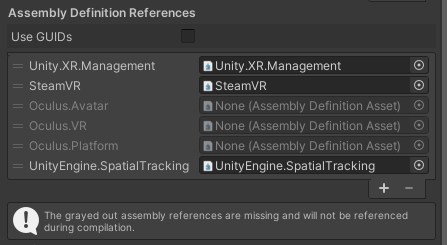
Personally I recommend unchecking Use GUIDs since it provides more information when any of the references is lost.
Assembly References
Supported in Unity 2019.2 and newer, assembly references (*.asmref) provides a way to include scripts under the folder into the existing assembly definition in other places, preventing from too many assemblies just because of scattered script folders.
Links
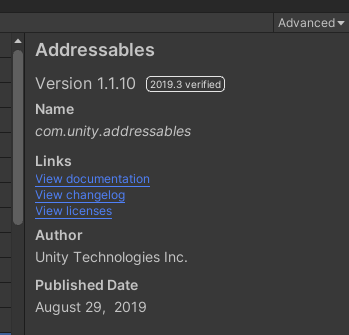
In the detail penal of Package Manager, there are some links to documentation, changelog and licenses. So far these links’ targets are hard-coded with some rules and only providing offline files, which means users must have the package installed or existing in Unity cache to open the files.
-
Documentation
Package Manager UI will find the documentation folder in the package root with this order:
Documentation~(special folder name, excluded from importing)Documentation
Then, it will find the entry of the documentation under the folder with this order:
index.md(case-insensitive)tableofcontents.md(case-insensitive)- First found
*.md
In Unity 2020.1 and later, next thing it will check is
documentationUrlfield inpackage.json, which can be a link to the online documentation. -
Changelog
Package Manager will find
CHANGELOG.mdin the package root. -
Licenses
Package Manager will find
LICENSE.mdin the package root.
Accessing Package Assets
To access assets in packages, use this path scheme:
Packages/com.example.package/...
For example:
Texture2D texture = (Texture2D)AssetDatabase.LoadAssetAtPath("Packages/com.example.package/Example/Images/image.png", typeof(Texture2D));
To get the absolute path of an asset:
string absolute = Path.GetFullPath("Packages/com.example.package/Example/Images/image.png");
Note that packages are read-only unless it’s imported from the local disk, which means you can’t create any asset into the published packages from the project.
Samples

Supported in Package Manager UI 2.0 and later, You can provide some example codes or example assets, such as demo scenes and prefabs, optionally imported into user’s project under the Assets folder. By design, scenes in pacakges can’t be opened under the Packages folder since the packages are read-only (unless you import the package from the disk and develop it).
Add samples field in your package.json:
{
  "samples": [
    {
      "displayName": "Sample 1",
      "description": "Description for sample 1.",
      "path": "Samples/sample-folder-1"
    },
    {
      "displayName": "Sample 2",
      "description": "Description for sample 2.",
      "path": "Samples/sample-folder-2"
    }
  ]
}
You can also exclude the sample folders from Unity’s import procedure by using the special folder names.
Developing Packages
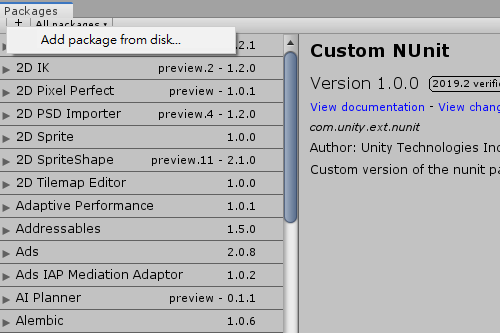
So far my personally recommended workflow is working on my game project with my custom package imported locally from disk. While I’m making my game, I can continuously add new features to my custom package and push the changes to the git repository. Note that if you imported the package from sources other than local disk, the package will be a copy of certain version storing in /Library/PackageCache in the project.
To import package from disk, open the package manager first, then click the plus icon at top-left corner to select your package.

Importing Packages from Git
Currently there is no native support in Unity Editor for importing packages from git. However, you may consider trying out UPM Git Extension, a custom package providing several convenient features, like importing certain branch or tag of package. (But the package isn’t working properly by the time I’m writing this.)
Installing Git
First, make sure you have Git installed and the PATH system environment variable has included its executable. You can type git in the command line to see if it recognizes the command.
Adding Git URL to Dependencies
Open /Packages/manifest.json in your project and add the git URL to the dependencies array.
{
  "dependencies": {
    "com.mycompany.mypackage": "https://github.com/account/my-package-project.git",
    // Other packages...
  }
}
It will get the HEAD of the repository by default. You can specify the branch or tag after the URL.
{
  "dependencies": {
    "com.mycompany.mypackage": "https://github.com/account/my-package-project.git#develop",
    // Other packages...
  }
}
{
  "dependencies": {
    "com.mycompany.mypackage": "https://github.com/account/my-package-project.git#v1.2.3",
    // Other packages...
  }
}
Then get back to the Unity editor, you will see the editor is resolving the packages you just add.
Updating Packages From Git
Once you import the package from git, Unity will add a lock field after dependencies in manifest.json to prevent any unexpected changes to the packages. Either you want to update the package or switch the tag, you have to remove corresponding entry in the lock array after editing the URL.
Scoped Package Registries
Unity supports scoped package registries for you to add custom registries other than Unity default ones. If you want to host one yourself, Verdaccio is recommended, which is very simple to setup.
Adding Registries
In /Packages/manifest.json, add a scopedRegistries field to link the registry you want to get packages from:
{
  "dependencies": {
    "com.mycompany.mypackage": "1.0.0",
    // Other packages...
  },
  "scopedRegistries": [
    {
      "name": "MyRegistry",
      "url": "https://my.company.com/registry",
      "scopes": [
        "com.mycompany"
      ]
    }
  ]
}
Note that only packages in namespaces listed in scopes will be displayed in Unity package manager window.
Publishing Packages
Unity uses npm to publish the packages since the whole structure is based on npm. You can get npm by installing Node.js.
If you’re not logged in, you have to login or create an account first:
npm adduser --registry <registry-url>
Note that you must specify the registry url for every command, or the default registry is npm’s public registry, which is https://registry.npmjs.org.
After you logged in, change the directory to the root of the package, then publish:
npm publish --registry <registry-url>
If you want to unpublish any package, although it’s not recommended, you can:
npm unpublish <package-name>@<version> --registry <registry-url>
Or if you want to unpublish all versions:
npm unpublish <package-name> --force --registry <registry-url>
If the target package was published less than 72 hours ago, it can be unpublished anytime; however, it needs to meet certain criteria beyond 72 hours. Check out the npm unpublish policy for more information.
Instead of entering URL for every single command, we can also add publishConfig field to package.json to set the default registry url for publishing.
"publishConfig": {
    "registry": "https://registry.mycompany.com"
}
Leave a Comment